Introduzione
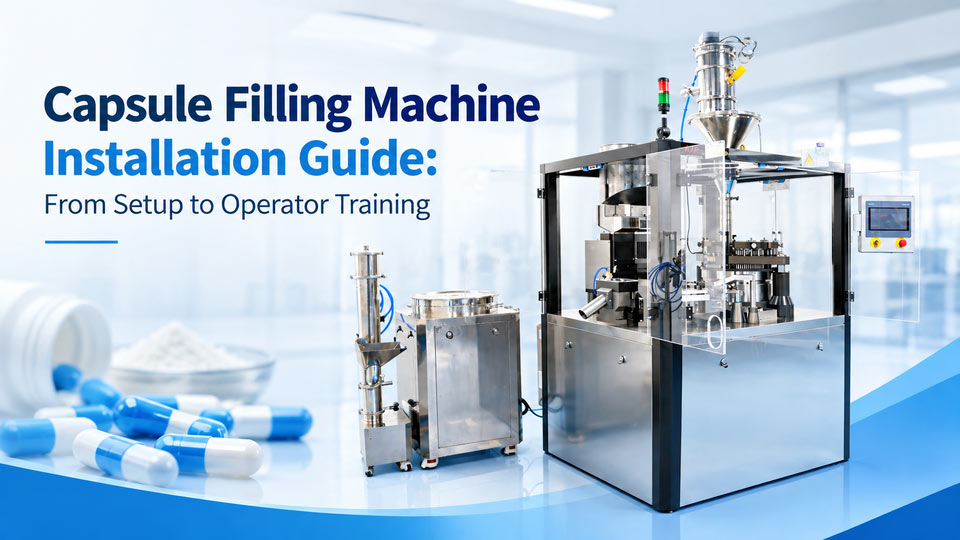
Before a macchina per il riempimento di capsule arrives, clients often focus most on the machine itself. Once the machine reaches the factory, the key question changes: how can we install it and start production correctly? The work after delivery, from installation to commissioning, reflects a manufacturer’s overall technical capability.
Operator training is another part that is often overlooked. Some manufacturers only support the first installation and basic commissioning. When problems occur during later production, operators may not know how to adjust the machine or handle the fault.
This article explains the complete process after a Capsule Filler arrives. It covers machine installation, messa in servizio, formazione degli operatori, pulizia, cambio stampo, fill weight adjustment, manutenzione, and common troubleshooting.
Punti di forza
- Capsule Filling Machine Installation covers machine assembly, connessioni, and auxiliary equipment installation after delivery.
- Capsule filling equipment commissioning checks machine functions and key stations before production.
- Capsule filler operator training helps production teams operate, regolare, pulito, and maintain the machine independently.
- Capsule filling machines changeover follows the sequence of cleaning, cambio stampo, and fill weight adjustment.
- Capsule filling machine maintenance and troubleshooting training helps operators handle common problems during later production.
1. How to Install a Capsule Filling Machine After Delivery
After delivery, capsule filler installation starts with unpacking and assembling the main machine. Engineers then connect the vacuum system, auxiliary equipment, energia, and compressed air before functional testing. This capsule filling machine installation procedure provides the basic setup for commissioning.
The following steps explain how to set up a capsule filling machine after delivery, from unpacking the main unit to completing the initial mechanical assembly.
Unpack and Assemble the Main Machine
The first step in Capsule Filler installation is to remove the transport protection and inspect the machine. Pharmaceutical machinery is commonly protected with three layers of plastic film during shipment. Some equipment also uses vacuum packaging with aluminum foil and foam cushioning to protect surfaces from moisture, graffi, and rust during transport.
After unpacking, locate the main components and install the powder hopper in its designated position. Connect the vacuum cleaner to the machine with the supplied hose and check that each connection is secure. The vacuum pump is then assembled with its valves, raccordi, and required connections before operation.
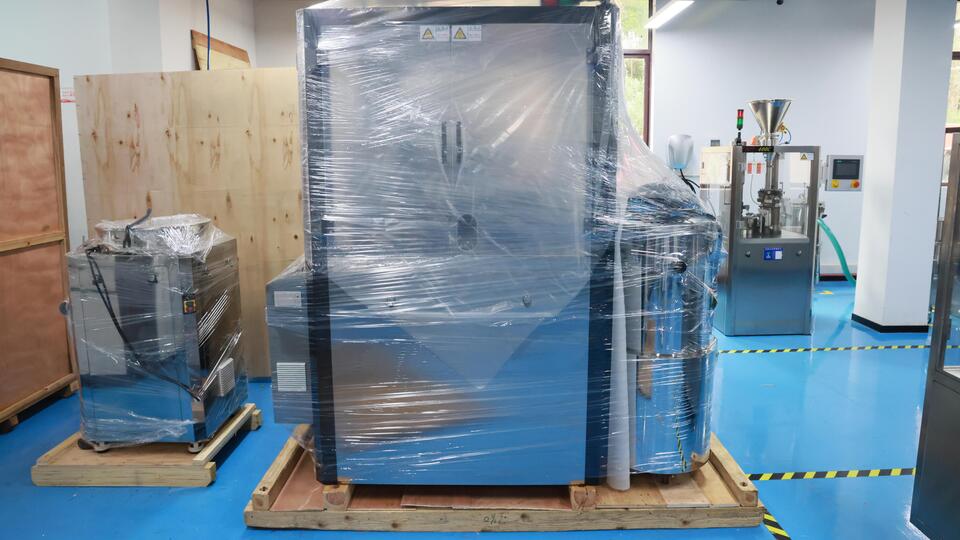
Unpacking the capsule filling machine is the first step.
Connect the Vacuum and Auxiliary Equipment
After assembling the main machine, engineers connect the vacuum system and other capsule filling machines auxiliary equipment. The correct connection of each hose and fitting supports stable material and capsule transfer during later testing. This stage also covers the capsule filling equipment vacuum system and connected support units.
The capsule filler vacuum pump connection requires the correct routing of each hose. The thin and thick hoses are connected to their designated ports, then secured with clamps. Engineers should check each connection before starting the vacuum system.
For how to connect a vacuum capsule loader to a capsule filling machine, the loader tube is assembled first. The long tube and U-shaped tube are connected to the loader, then the discharge outlet is aligned with the capsule inlet. This allows the vacuum loader to transfer capsules into the filling machine.
The remaining capsule filling machine auxiliary equipment is then connected around the production line. This can include capsule shortage detection, powder shortage alarms, and a capsule sorting and polishing machine. Each unit should be positioned according to the machine connection points before its power and vacuum lines are connected.
Connect Power and Compressed Air
Once the auxiliary equipment is connected, engineers can connect the utilities to the capsule filling equipment. The compressed air line connects to the air inlet of the capsule filler. The connection should be secured before the machine is powered on.
For how to connect power to a capsule filling machine, the electrical cable is connected through an aviation plug. Both ends should be locked securely before wiring. The cable includes one neutral wire, one ground wire, and three live wires, with labels used to identify each connection.
After completing the capsule filling machine electrical wiring, engineers can check the incoming voltage. A VT meter is used to test the three-phase supply between live wires and the single-phase supply between a live wire and neutral. The voltage values should be checked against the electrical specification of the equipment.
If the PLC indicates reversed live wires, the power must be switched off before checking the wiring. In this situation, the positions of two live wires, such as I1 and I2, may need to be exchanged. After restarting the capsule filling machine, check the PLC again to confirm that the alarm has cleared.
Clean and Inspect the Machine Before Testing
After the mechanical and electrical connections are completed, capsule filling machine cleaning should be performed before functional testing. Rimuovere la polvere, packaging debris, and foreign matter from the machine surface and working areas. A clean cloth or vacuum cleaner can be used to remove loose particles from the equipment.
For how to clean a capsule filling machine, wipe the relevant contact surfaces with 95% food-grade alcohol after the initial cleaning. Allow the cleaned surfaces to dry before starting the machine. If a thin layer of protective oil remains on metal surfaces after unpacking, wipe it off before operation. This prepares the machine for contact with pharmaceutical materials.
The machine should then undergo a capsule filling machine inspection before startup. Engineers should check both the mechanical condition and the working area before entering the first function test. The following capsule filling machine pre-operation checklist can be used during this stage.
| Inspection Item | Cosa controllare | Expected Condition |
|---|---|---|
| Machine surface | Polvere, packaging debris, and foreign matter | Clean and free of visible debris |
| Material contact areas | Residue and surface cleanliness | Clean and ready for operation |
| Metal surfaces | Remaining protective oil | Protective oil removed where required |
| Mechanical components | Loose parts or abnormal movement | No loose parts found |
| Machine interior | Foreign objects or installation debris | No foreign objects present |
| Vacuum connections | Hoses, raccordi, and clamps | Connections secured |
| Compressed air connection | Air inlet and connection point | Connection secured |
| Electrical connection | Power cable and aviation plug | Correctly connected and secured |
| Safety condition | Emergency stop and basic safety functions | Ready for function testing |
This capsule filler inspection should be completed before the main power is turned on for functional testing. Any loose component, foreign object, or abnormal connection should be checked before proceeding to the next stage.
Test the Machine and Supporting Equipment
After cleaning and inspection, engineers can begin the capsule filling machine function test. Before testing, check the emergency stop, main power, e aria compressa. Then enter the HMI menu and test each machine function step by step.
For the vacuum system, start the vacuum pump and check the suction at the capsule separation station. Place a finger near the suction cup used to separate the capsule body and cap. The suction can be felt directly to confirm whether the vacuum is being generated at the separation point.
This provides a quick field check for the capsule filling machine vacuum system. If the suction is weak or absent, engineers should check the vacuum hose, raccordi, valvole, and pump connections before continuing the test.
The dust collector can then be started separately. Check whether the dust collector produces suction through the connected hose. The air outlet should also be checked to confirm that compressed air is available at the required working point.
The automatic capsule supply system is tested next. Start the capsule supply function and check whether capsules are transferred toward the filling machine. Engineers can also test the capsule shortage detection function and confirm that the related alarm responds correctly.
The capsule sorting and polishing machine is tested after its power and vacuum connections are confirmed. Start the unit and check whether capsules can enter the polishing machine and move through the connected line. This forms part of the capsule filling machine auxiliary equipment testing.
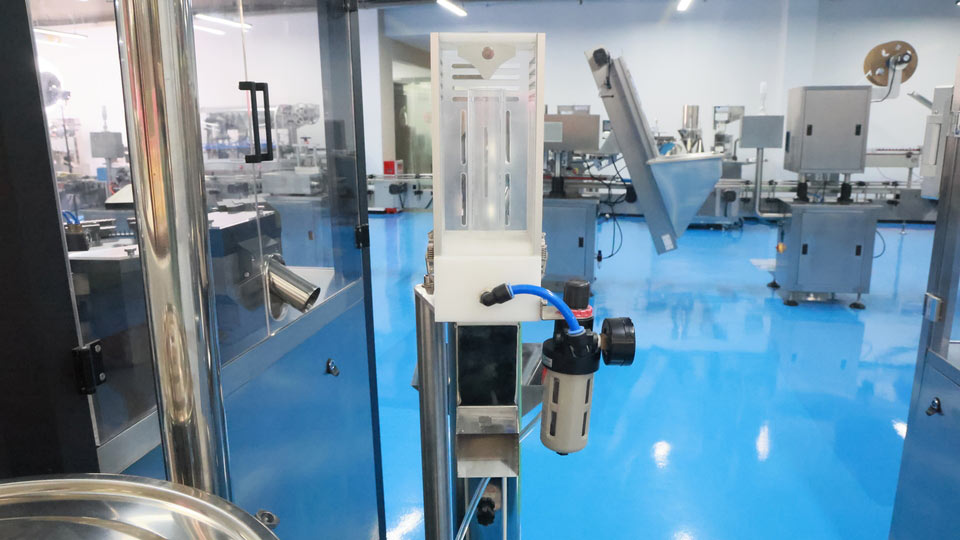
The sorting and polishing machine removes capsules with incorrect weights and cleans excess powder from the capsule surface.
After the auxiliary equipment passes its basic checks, start the main motor from the HMI. Check the machine movement and confirm that the main functions respond correctly. Then activate automatic capsule supply and observe the capsule feeding process.
The first filling test can then be performed with the capsule supply running. Adjust the machine height to match the filling position. If powder leaks between the dosing plate and copper plate, use a feeler gauge to check and fine-tune the gap.
This step completes the initial capsule filling machine commissioning check. Engineers can then move to detailed commissioning, including HMI operation, regolazione della stazione, fill weight adjustment, and production training.
2. How Engineers Commission the Capsule Filling Machine
After the initial function test, engineers move to capsule filling machine commissioning. This stage checks the machine’s operating functions and movement in more detail. Engineers use the HMI to test individual functions and observe the related mechanical actions. The goal is to confirm that the machine responds correctly before production testing.
Test HMI Functions and Machine Movement
The capsule filling machine HMI function test starts from the main control screen. Engineers enter the relevant HMI pages and activate each available function. The machine response is checked against the selected function before moving to the next operation.
The main motor and automatic capsule supply are tested through the HMI. Engineers observe whether the machine starts, si ferma, and performs the selected movement correctly. Supporting functions can also be activated separately during this stage.
Engineers also observe the mechanical movement while operating the HMI. The purpose is to confirm that the selected command produces the expected action at the corresponding station. Any abnormal movement, unexpected stop, or missing action should be checked before continuing the commissioning process.
The vacuum pump, dust collector, air outlet, automatic capsule supply, and capsule polishing unit can also be operated from their related controls.
Adjust the Filling Station Before Production
After the basic machine movements are confirmed, engineers begin capsule filling machine fill station adjustment. The machine height is adjusted first to match the filling position. This provides the correct working position for the dosing system before the first filling test.
When checking how to adjust a capsule filling equipment, engineers should inspect the gap between the dosing plate and copper plate. This gap affects the contact between the two parts during the filling process. A feeler gauge can be used to check the gap at the filling station.
If the gap is too large, powder may escape from the area between the dosing plate and copper plate. This is a common point to check when troubleshooting capsule filling machine powder leakage during the first filling test. Engineers can use the feeler gauge to check the gap and make a fine adjustment when required.
After the capsule filler gap adjustment, run the filling function again and observe the dosing area. Check whether powder remains within the intended filling area and whether the machine continues its normal movement. If the result is not satisfactory, the gap can be checked and adjusted again.
Run the First Production Test
After the filling station has been adjusted, engineers can start the capsule filling machine first production test. The automatic capsule supply is activated, and engineers observe how capsules enter the machine and move through the working stations.
Durante la prova, engineers observe the capsule feeding and filling process together. The capsule separation station should separate the capsule body and cap correctly. The filling station should then complete the filling movement without abnormal powder leakage.
If a problem appears during the capsule filling equipment production test, engineers can return to the related station and make the required adjustment. Per esempio, powder leakage at the dosing area requires another check of the dosing plate and copper plate gap.
After the initial test is completed, IL riempitrice automatica di capsule commissioning stage can move into operator training. The next stage focuses on daily operation, pulizia, capsule size changeover, and fill weight adjustment.
3. How Engineers Train the Customer’s Production Team
After capsule filling machine commissioning, the equipment supplier’s engineers train the customer’s production team. The training covers daily operation, pulizia, capsule size changeover, fill weight adjustment, and basic machine maintenance.
The training starts with basic machine operation and cleaning. It then moves to capsule filling machine changeover, fill weight adjustment, and common operating procedures. The engineer can check each step during hands-on training before the machine is handed over to the customer’s team.
Clean the Capsule Filling Machine Before Changeover
The supplier’s engineer first demonstrates capsule filler cleaning to the customer’s production team. The engineer shows which parts need to be removed, which areas require cleaning, and how to check for remaining powder or foreign matter.
For how to clean a capsule filling machine, the demonstrated cleaning process can include water cleaning, air drying, cloth drying, and wiping with 95% food-grade alcohol. Parts should be dried before the next cleaning step.
During capsule filling machine cleaning before changeover, the engineer also shows the team how to inspect the working areas after cleaning. Loose parts, powder residue, and foreign matter should be checked before the machine is reassembled.
The customer’s team then performs the cleaning steps under the engineer’s guidance. This hands-on process helps operators become familiar with the machine before they begin capsule filling machine changeover and mold replacement.
Change the Mold and Capsule Size
Dopo la pulizia, the supplier’s engineer demonstrates the capsule filling machine mold change to the customer’s production team. The engineer first explains the parts that change with the capsule size. The operators then follow the same sequence and practice the changeover themselves.
A capsule filling machine changeover involves more than replacing the main mold. Depending on the capsule size, the feeding station, bacchette di riempimento, disco dosatore, stazione di chiusura, and outlet may also require adjustment or replacement. The vacuum-related parts may also need to match the selected capsule size.
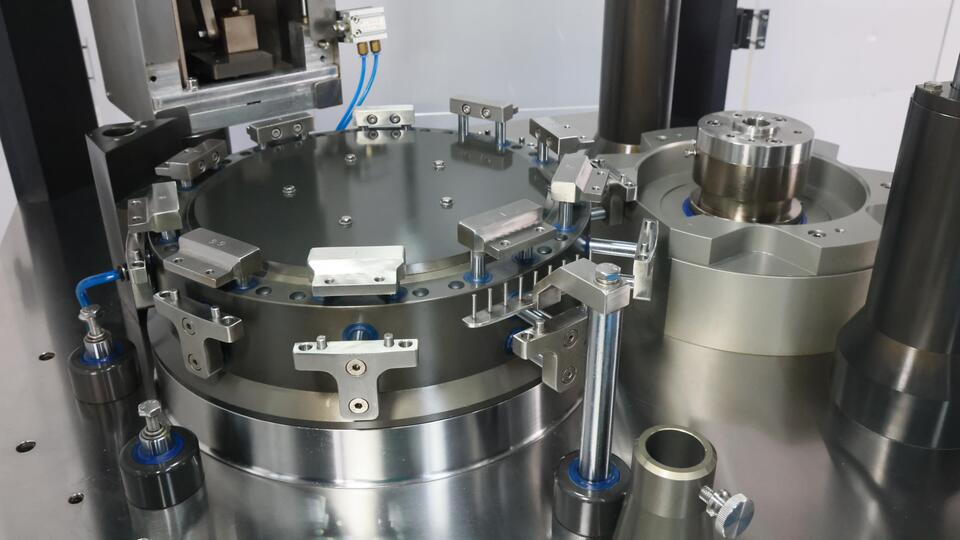
Engineers Training on the Complete Capsule Filling Machine Mold Disassembly and Assembly Process
When demonstrating how to change capsule size on a filling machine, the engineer shows the team how to remove the existing parts and install the corresponding parts for the new size. Each part should be positioned correctly before the machine is restarted.
The engineer also checks the alignment of the changed parts before testing. The operators then run the machine at the new capsule size and observe capsule feeding, separazione, Riempimento, e chiusura. Any abnormal movement or capsule handling problem should be corrected before production.
This hands-on capsule filling machine changeover procedure gives the customer’s team practical experience with different capsule sizes. After the mold and related parts are correctly changed, the engineer can continue with capsule fill weight adjustment.
Adjust Capsule Fill Weight After Mold Change
After changing the capsule size, the fill weight must be checked before normal production starts. The machine may use the correct mold and dosing disc, but the target fill weight still needs to be confirmed with the actual product.
During on-site training, the engineer first shows the customer team how the corresponding filling rods and dosing disc are installed. The filling rods control the amount of powder compressed into each dosing position. Their position and setting therefore affect the final capsule fill weight.
The engineer then runs the capsule filling machine at a low speed and collects a small sample of filled capsules. Each capsule is weighed to check whether the actual fill weight meets the target specified in the production requirements.
If the weight is outside the target range, the engineer demonstrates the capsule filling machine fill weight adjustment procedure. Depending on the machine design, the filling depth or related dosing parameters are adjusted. The machine is then run again, and another sample is weighed.
This process is repeated until the measured fill weight reaches the required range. The customer’s operators are trained to record the adjustment and confirm the result instead of relying only on the machine display.
For clients learning how to adjust capsule fill weight, the engineer also explains how to remove and reinstall the filling rods. On Ruida Packing capsule filling machines, the filling rods use a clip-style pull-out slot. This allows the trained team to remove the rods quickly without a complicated disassembly process.
Ruida Packing uses a holder design, allowing the filling rods to be replaced in just 15 minuti.
After the adjustment is completed, the engineer checks several capsules from different dosing positions. This helps the customer team understand that capsule fill weight adjustment after changeover is not only about changing one machine parameter. The actual product weight must be verified through sample weighing and repeated adjustment.
This training gives the customer team a practical procedure for how to adjust fill weight on a capsule filling machine after changing capsule specifications, rather than simply providing a parameter value to copy.
Conclusione
Installing and training for an automatic capsule filling machine are more than basic after-sales services. They test a supplier’s overall technical and delivery capabilities. From site preparation and commissioning to changeover, fill weight adjustment, pulizia, e risoluzione dei problemi, every step affects stable production.
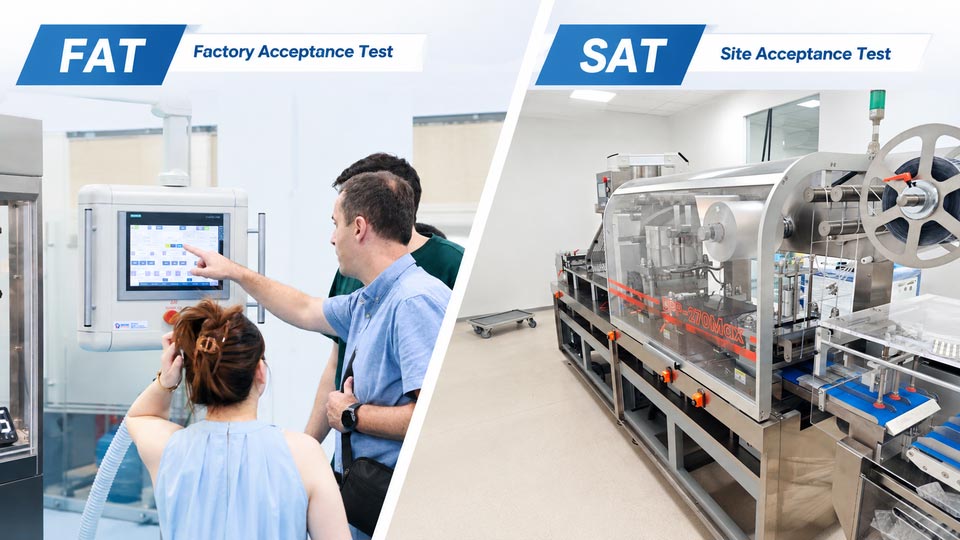
When selecting a supplier, buyers should therefore evaluate not only machine specifications and price, but also installation support, formazione dell'ingegnere, technical documentation, and after-sales service. Established pharmaceutical equipment suppliers such as Syntegon, C'È, and ACG provide structured technical support and training as part of their equipment services. Ruida Packing also provides FAT, on-site installation, messa in servizio, formazione degli operatori, technical manuals, e supporto post-vendita.
The right supplier should not only deliver the machine, but also help the client’s team operate, maintain, and troubleshoot it with confidence.
Domande frequenti
What should be prepared before installing an automatic capsule filling machine?
The client should confirm the cleanroom classification, temperature and humidity, HVAC system, aria compressa, vuoto, electrical power, grounding, installation space, overhead clearance, floor condition, and transportation route before installation.
Why is operator training important after capsule filling machine installation?
Training helps the client’s team understand machine operation, cambio, fill weight adjustment, pulizia, manutenzione, and basic troubleshooting. Hands-on training also allows operators to practice these procedures directly on the machine.
How do you adjust capsule fill weight after a changeover?
After installing the correct mold, bacchette di riempimento, and dosing disc, the machine is run with the actual product. Sample capsules are weighed, and the filling depth or relevant dosing parameters are adjusted according to the measured result.
How can clients check capsule fill weight uniformity?
The trained team should collect samples from the machine, weigh them, record the results, and compare the measured weights against the specified target and acceptable variation range. If the results are inconsistent, the dosing settings should be checked and adjusted.
Riferimenti
Commissione europea – Volume EudraLex 4: Buone pratiche di produzione (GMP) Guidelines
Volume EudraLex 4 — European Commission
ISO — ISO 14644-1:2015, Cleanrooms and Associated Controlled Environments
ISO 14644-1:2015 — ISO